Standing Seam Metal Roofs Installation Tips
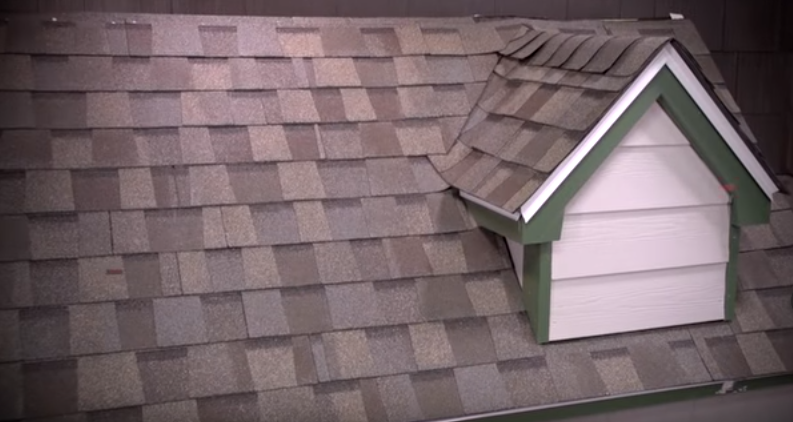
With the benefits of being good-looking, long-lasting, and classic, standing seam metal roofs can mesh with any type of design or building structure as the fundamental materials have circulated the market since the 19th century. This is a smart structure of metal layers attached to each other using seams that are 1”+ above the flat area. Standing-seam roofs are pleasant to look at and especially long-lasting, functioning as the main roofing system and one of the few choices for supplemental roofs over bay windows and patios.
They also enable a fairly easy set-up, particularly on homes containing fewer elevations. They only need a few expert hand organs and the basic skills of an old-home reviver. If you are impressed by the looks and durability of tin roofs, here are some key tips to install them by yourself.
Practice Makes Perfect
Start with a dirt-free roof panel. Remove any outworn roofing and take off old nails to ensure that the deck is void of any item that would obscure or cause damage to the new tin roof. In homes with a traditional non-complex structure, metal standing seam roofs are often set up over separated decks or slop sheaths (boards covered with holes of approx. 1 ½”). However, all three typical materials will do a similar job over concealed boards or plywood panels. The next stage of the expert installation process (for alloy or steel tinplates) is to undercoat them with red rosin paper.
It’s best to avoid overcoating them with black roofing or tar paper because the coal inside them will damage their surface. Copper producers suggest overlays using red rosin paper to prevent the felt from sticking to the metal.
Whatever the case, it’s wise to begin the process by using metal framing around the edges of the roof to accommodate the ½”-1” protrusion of the sheet material to prevent any water from flowing up under the tips.
It’s best to use the common ready-made metal drip edge for galvanized steel and zinc. Likewise, use copper edge strips for copper material. Nail the framing at around 10” space along with the gable tips and edges and virtually any spot the water may leak.
Prepare your sheets
A pan – the long body of the roofing sheet material, should be curved up at the tips to create seams. Meticulous designing of the structure and measurement of the metals will result in a smoother and more appealing installation long-term. First, draw the structure of your roof, so you can estimate the balanced seams and prevent any uneven or too narrow sheet pans. Many roofs in old homes are constructed with asymmetrical measurements, so you may need to use your structure from the center of the roof to divide any weird empty spots. If you intend to create seams on the length of the ridges where the two roofs collide, don’t forget to balance out the pan spaces in a way that enables the seams of the first rood to touch the middle of the pans in the second roof. By following this method, you won’t end up with too much metal to attach into a symmetrical solid ridge seam.
To create pans, calculate 4 inches above the roof ridge and approx. 1 inch over the roof tip. Next, crop your metal to this measurement using tinner snips or shears. Then crook the long tips of the pan at 1” on one side and 1 ½” on the second. Note: the outboard primary and last pans will have a single edge on a typical gable roof–the edge that goes over the length of the roof rake. Crouch down 1” so it can be seamed to the closing strip or drip edge.
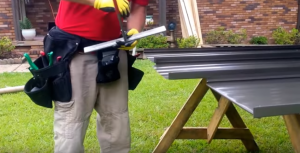
The utensils made for this use, pan benders, are available in many different styles. These are usually common universal kinds that do similar work to a massive pair of closing pliers and patent kinds that use foot pedals to accelerate the bonding time. Some may require to settle the jaws to the target seam by fixing the bolts and stops. In most cases, it’s wise to bend a tip in 2 phases. The first would be to crouch the whole edge at a 45-degree angle and then go back to bend to an entire 90-degree angle. Take some pains to ensure that you end up with a sharp and distinct ridge in the metal. Don’t toss any small bits of scrap metal. Crop them instead into 1X2½ inch strips to create clips for locking the pans to the roof deck.
Installation of Pans
Once you bend all your pans, the next step is to lay the roof. Begin with an end pan first, attaching the 1” bend up fitting to the roof rack. If you work on an old home, some metal roofing experts prefer to begin laying pans in the center of the deck up to the edges to ensure that the pans sit square. Then, adjust the pan to the deck by crouching clips over the forward end every 10 inches and then nail the clips to the roof deck. Remember to keep every crease sharp and nice–they will have to be crimped into a seam with the bordering pan.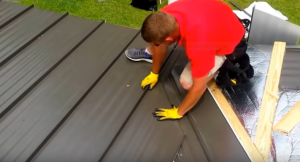
When your edge pan is fastened, you’ll have to crouch the tips in the perimeter of the closing strip or drip edge around the roof. You can simply ply the metal with locking-jaw pliers. On the down edge, on the other hand, you will have to crop the pan again to approx 1 inch at the upper bends that form the laying seams.
Next, bend the metal in the perimeter of the locking strip or drip edge. Once the edge pan is set up, you can begin laying the remaining roofing and create seams. Get a universal pan and cover it with the 1 1/2inch tip near the 1-inch tip you have just bent down. Adjust its placement in a way that the upper and down tips align with the former pan and ensure that the pan is tightly fitted against the deck. Then crimp both panes together, every 2 inches using locking-jaw pliers.
Begin making seams between the initial two locking jaw pliers at the upper roof edge with a seam locker tool re.g iron against the surface of 1 inch upward metal tip, with a smooth-faced mallet, crimp the 1½ inch metal tip on the iron to a 90-degree angle, drifting the tool while hammering. Once you have crimped approx. 2 inches of the seam in this manner, take off the iron and press the metal downwards to another 45 degrees with the hammer only. Next, slide the iron to the seam’s reverse facet, position it against the metal surface and bang the seam locked into a solid crimp, ensuring that the lengthy metal top totally conceals the shorter tip and that all the clips are crimped and concealed as well.
During this stage that you have finished a bend, you will also have to do the same steps again to merge the pans into a 2X lock standing seam. Begin with the center of each part you have completed and position the shorter facet of the iron against the same tip where you started and crimp the metal down to a 90-degree angle. Keep following the remaining steps on the biggest surface of the seam (as big as possible) between the locking jaw pliers and then continue to complete another part. Once you have finished a nearby seam part, you can take off one of the pliers and cover the seam beneath it.
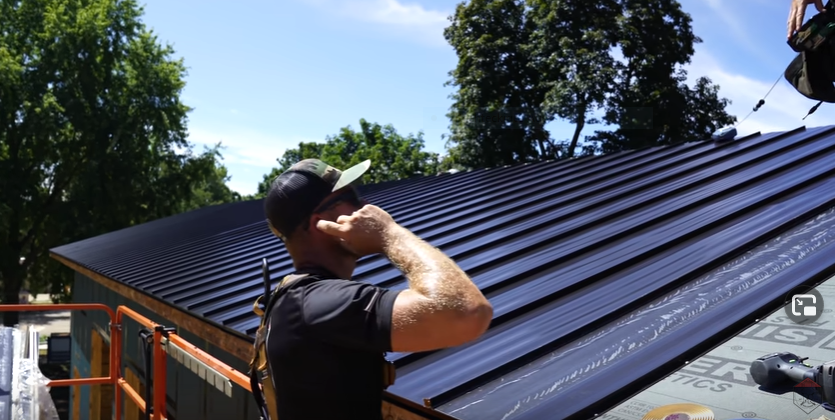
After becoming adept at the fundamental crimping and seaming steps, you can utilize all your acquired skills to create the roof and hip slopes, creased, and other secondary units that may be employed on more complex roofing structures. Once you are finished, color your zinc Terne II roof soon after with a classic tone of red, black, silver, and green and then sit back and admire the classic historic structure that a metal seam roof has to offer.